(Summer 2019)
For a while I’ve wanted to do a simple animatronic for Halloween. Each year we do a simple setup outside our house for the neighbourhood kids, and each year we try to add to it, usually with some better items we pick up over the year, but I wanted to start adding some home made items, in that spirit of home-made Halloween fare.
A couple of years ago I did a head prop I made from a 100yen polystyrene wig stand, first as a ‘grey’ alien head, then I got some latex and a craft knife and made something a little more gory. I quite enjoyed making it and looking at the response it got from both kids and adults, they seemed to be intrigued too.
This time I wanted to make a simple animatronic creature - some kind of head, then a hand etc.. I decided to start with eyeballs, with the idea of having them under a cowl as the head, then later on, a hand and more as time allowed. In this page I wanted to quickly review my first thought on how to do this simply and reliably. I also want to apologise in advance for the photos - I’ll take some proper ones for the page - the ones here were my work in progress photos during early testing (to prove what I had connected to what).
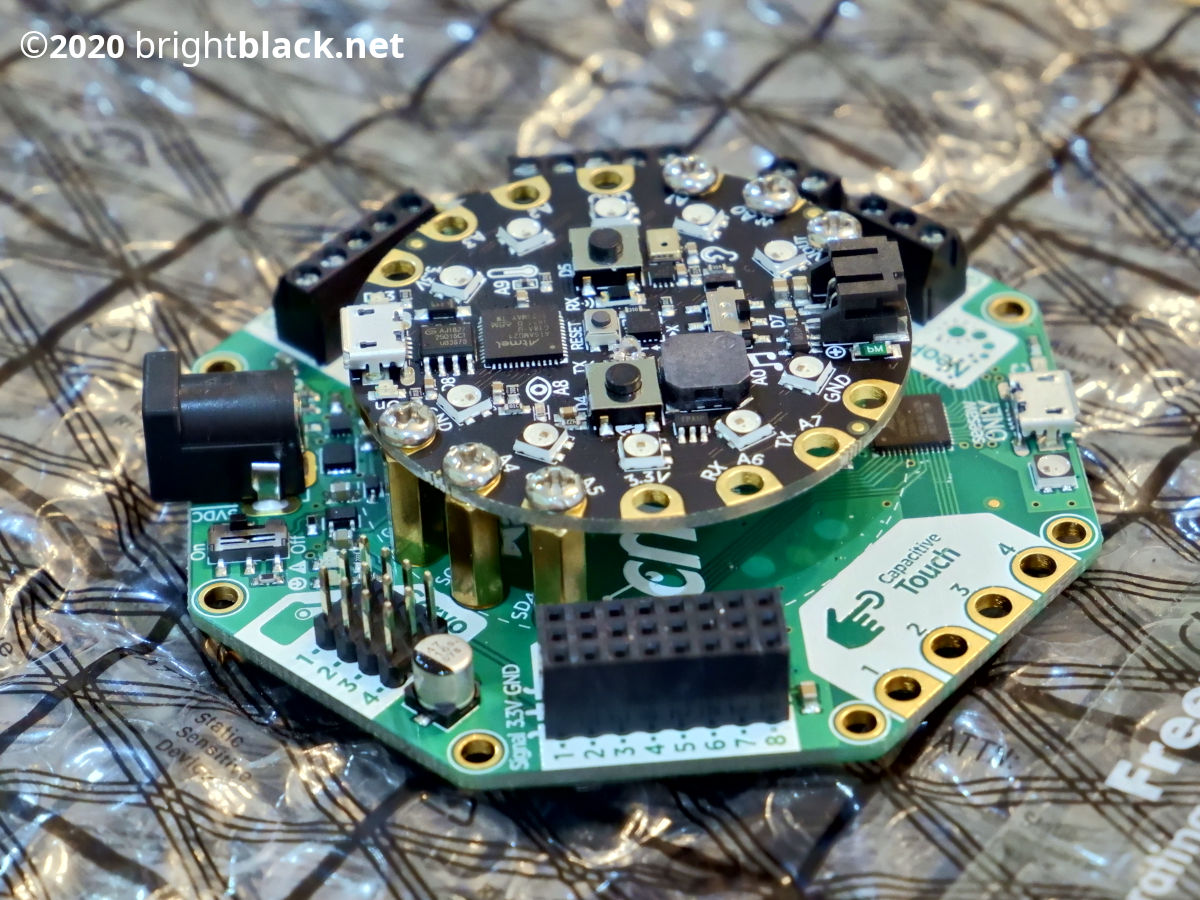
The first idea then was to do a servo driven ‘ping pong ball’ setup. I had a look around and had sort-of idea in my mind. As with many of these fairly basic ideas, there are usually projects already out there, so I took a look on Adafruit and there was a project which was close, and I was pleased it was pretty close to the idea in my head. I’d been trying to decide how was going to be best to do this, interfacing likely with my Pi3 and using servos. As some discussions on the Adafruit forums and that project suggested, the Crickit board is a close match for this, paired with the Circuit PLayground Express.
The Crickit (Creative Robotics & Interactive Construction Kit!) can be used with up to 4 servos as well as other things like motors, LEDs and touch sensors. This was paired with the Circuit Playground Express which itself has sensor inputs, onboard LEDs, and provides the power and some brains for driving the Crickit board.
For the first time, I was going to be ‘coding’ this in Microsoft MakeCode, which is largely Javascript derived under the lid, but presents mainly as a block style form of programming, a bit like Scratch.

Hooking this all up and driving a couple of servos wasn’t difficult, though I ended up connecting the board to a Windows laptop for initial code checks with the Microsoft MakeCode, before driving it from the Pi, though the Circuit Playground Express \ Crickit (CPE\C) is autonomous once you copy the code across, presenting itself as a mountable device on reboot. I did have some odd issues with some test code, which looked identical to sample files in the MakeCode Editor (a browser) but in a test editor would have trailing characters. This must’ve been a known issue as I couldn’t replicate the problem after an update.
I spent quite a bit of time understanding where the extent of the servos were so what was looking forwards, and what was the envelope of where an eye would go were in terms of x and y settings.
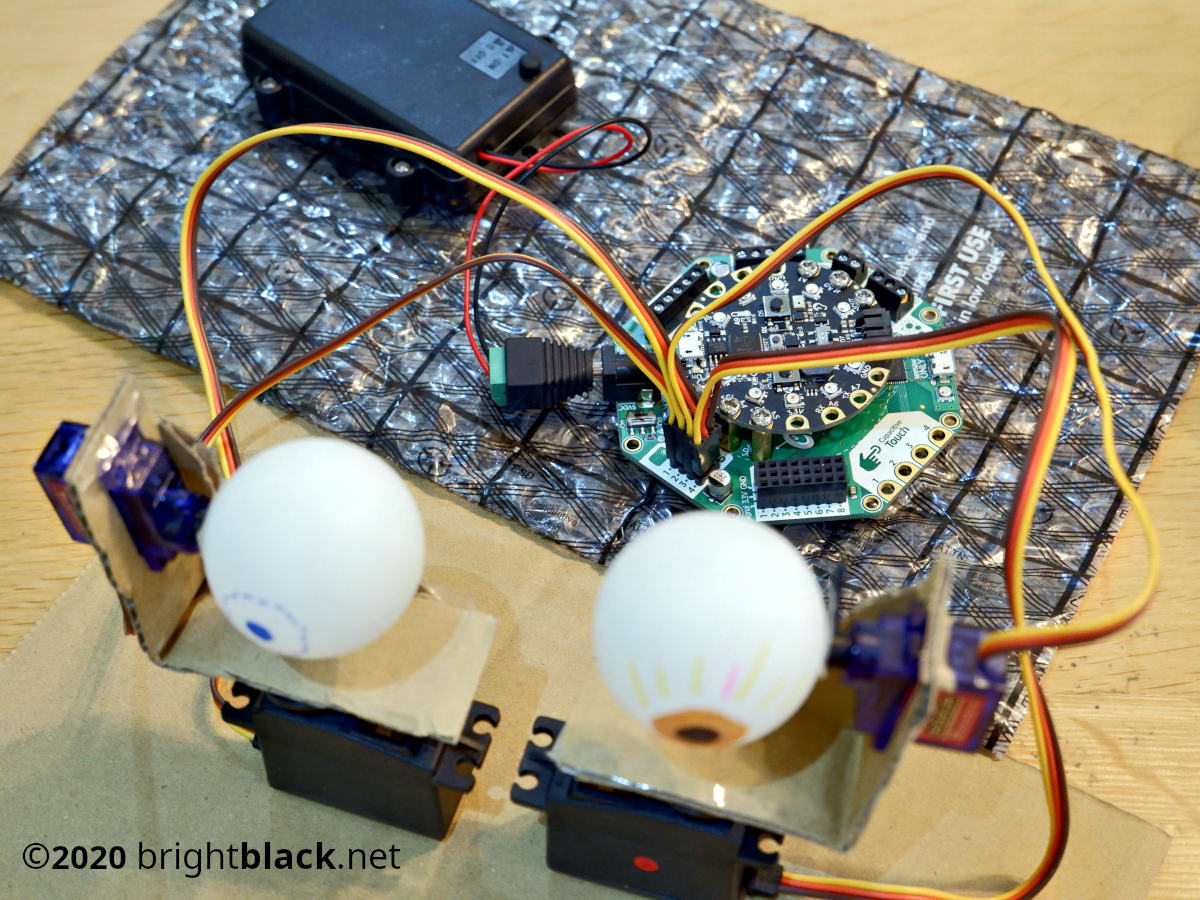
Initially I thought about just having two motors for the two axes (x and y) and a jig to hold two ping pong balls so they’d move in sync, since some forums said they’d move out of sync with different servos. I fabricated it out of waribashi (wooden chopsticks) and card initially as proof of concept, and whilst it did work, in practice the jig was a bit of a mess to make work and fit into any kind of future facemask.
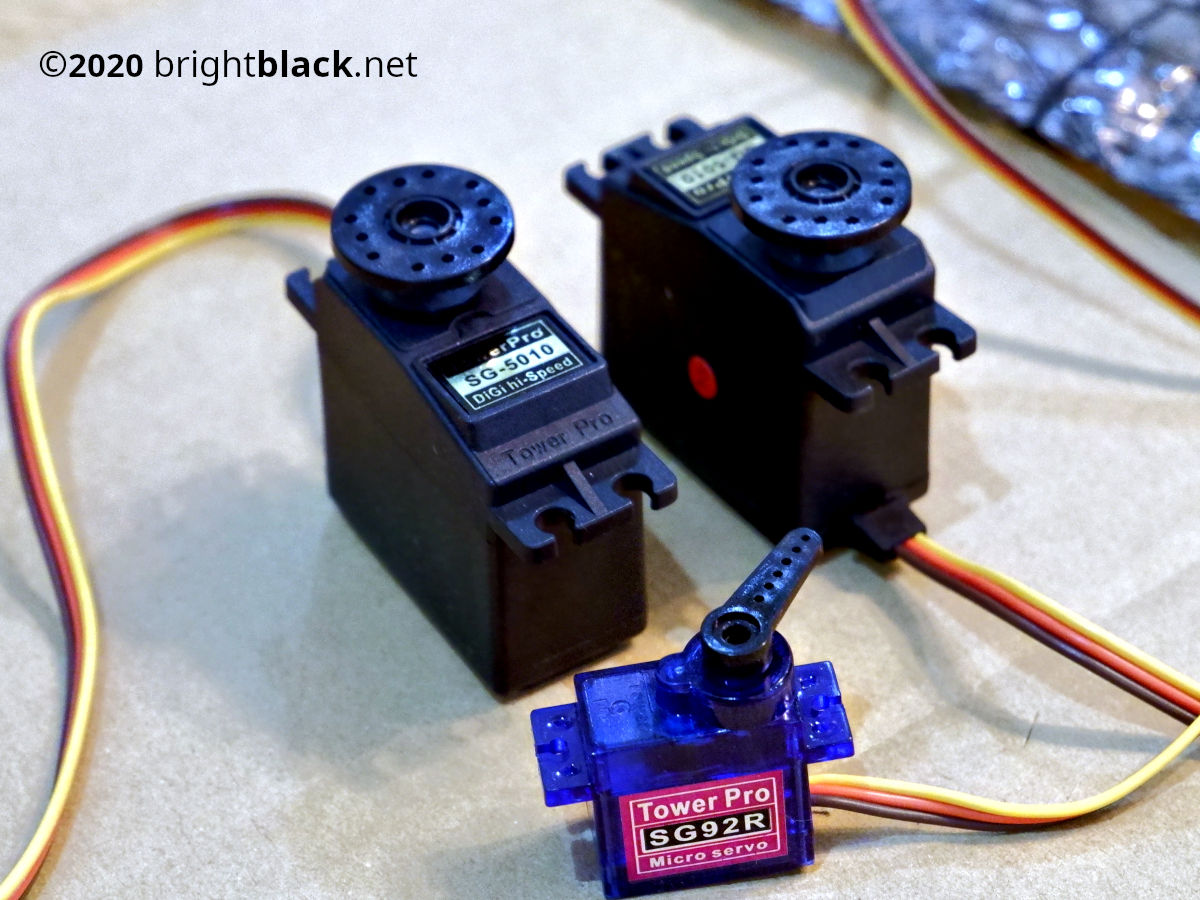
Version two I decided to go for two servos per eyeball since the CPE\C could handle four servos, though it forced me to buy a power converter rather than run from the batteries I’d been using so far. That was just a good move anyway, even if this was to be used outside. Building out was simple, there’s no soldering or anything, just hooking it up and writing the code.
It all worked, and it looked good. I didn’t see any of the syncing issues mentioned, and I like these tactile eyeballs creepily following you around. I even made use of the LEDs on the CPE to create a eerie red backlight behind the eyeballs on a temporary mount. It was good fun moving these around with the MakeCode to make them look like they were moving more organically. Fun.
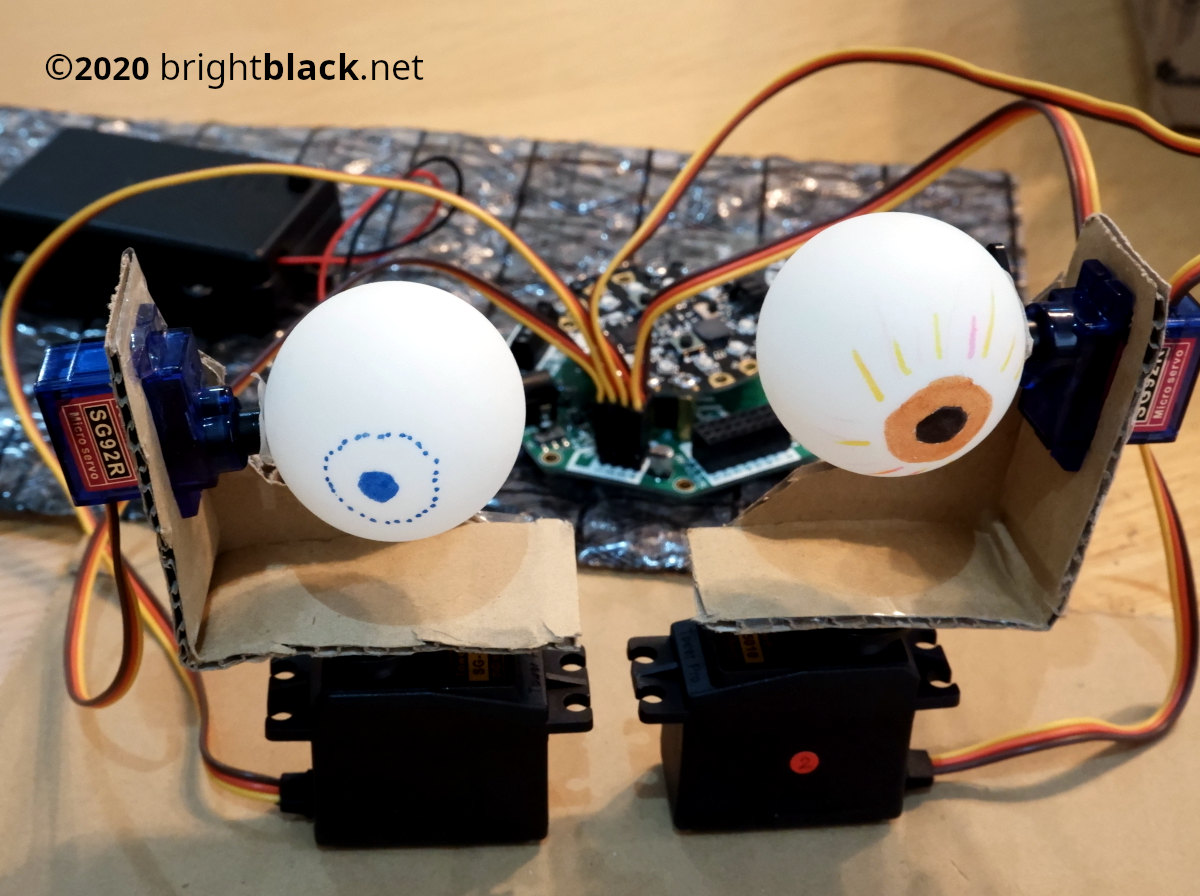
The issue then was the mounting; if they were simply under a hood, the workings were too obvious, and would need to be behind a mask, but that proved to be an issue, as the servo mounts needed space to move. After a bit of time actually enjoying playing around with the effect, I decided to try something else for the eyes, but happy I’d learned some tricks and gotchas, I decided to reuse the servos in a potential animatronic claw later, and to go with a different approach for eyes using LCD screen instead of ’eyeballs’. I think that was the right decision, though as I found out, swapping physical for software proved to have its own challenges. All that said though,I can see me in a couple of years revisiting this more physical implementation.